
How to convert text encoding
Scanning is read-only; nothing is written until you confirm and the backup is done.
1. Open it#
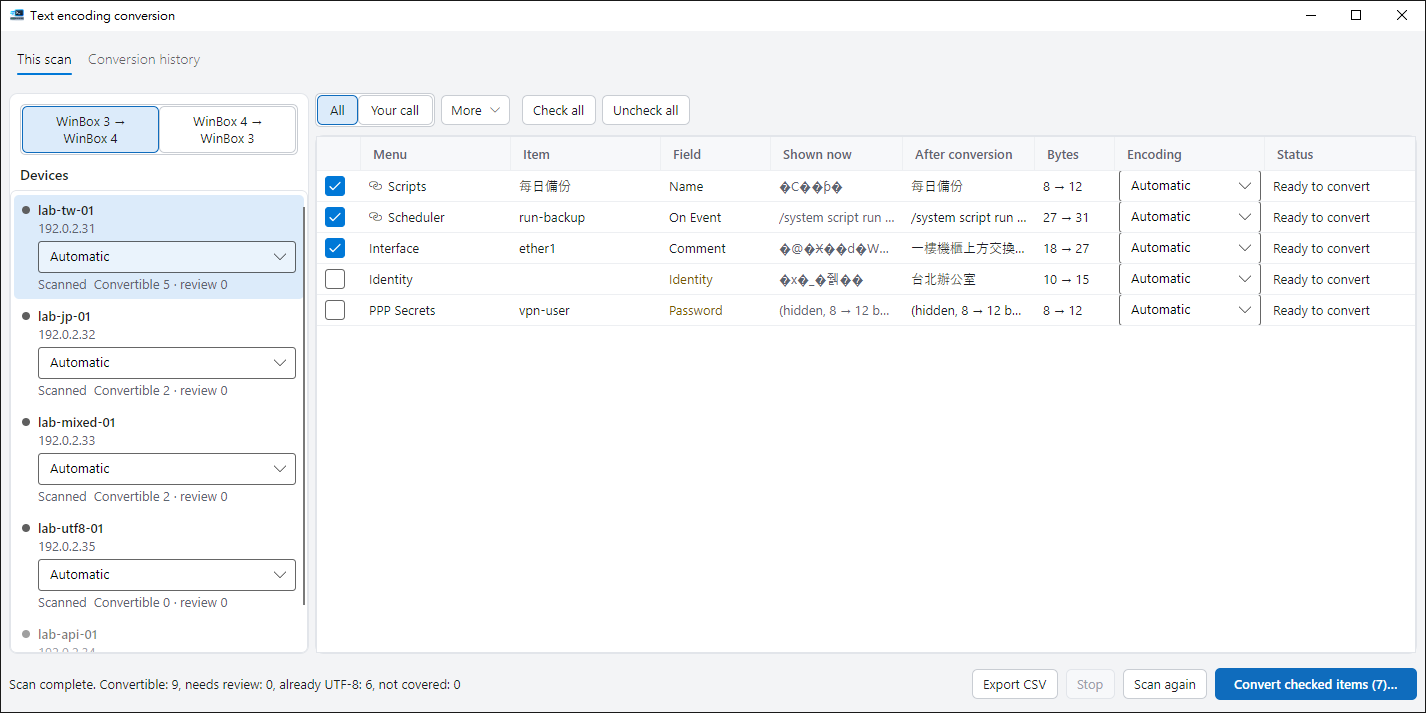
Select devices and click “Text encoding”. It requires the WinBox protocol (8291).
2. Scan#
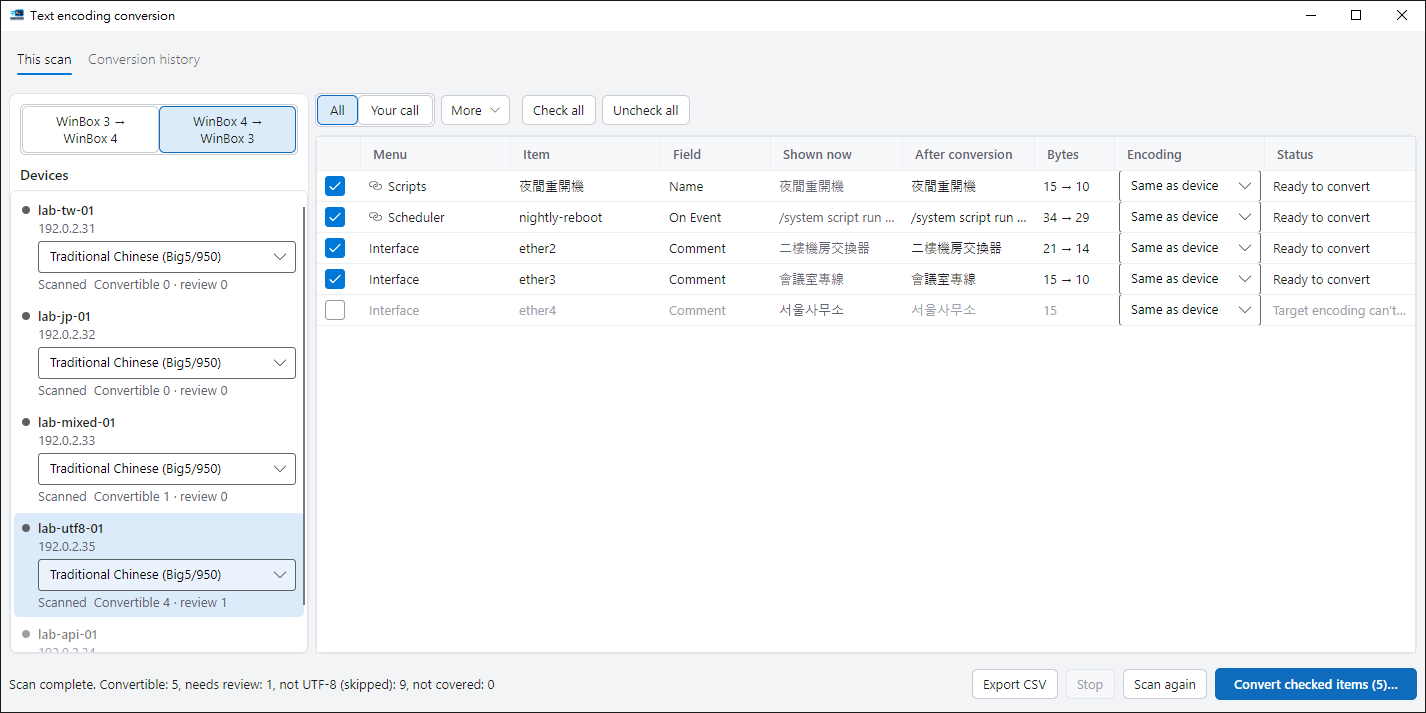
Click “Scan”. Scanning only reads and never changes a device. When it finishes, each item shows what it looks like now and what it becomes. Items that cannot be identified cannot be checked.
3. Decide what to convert#
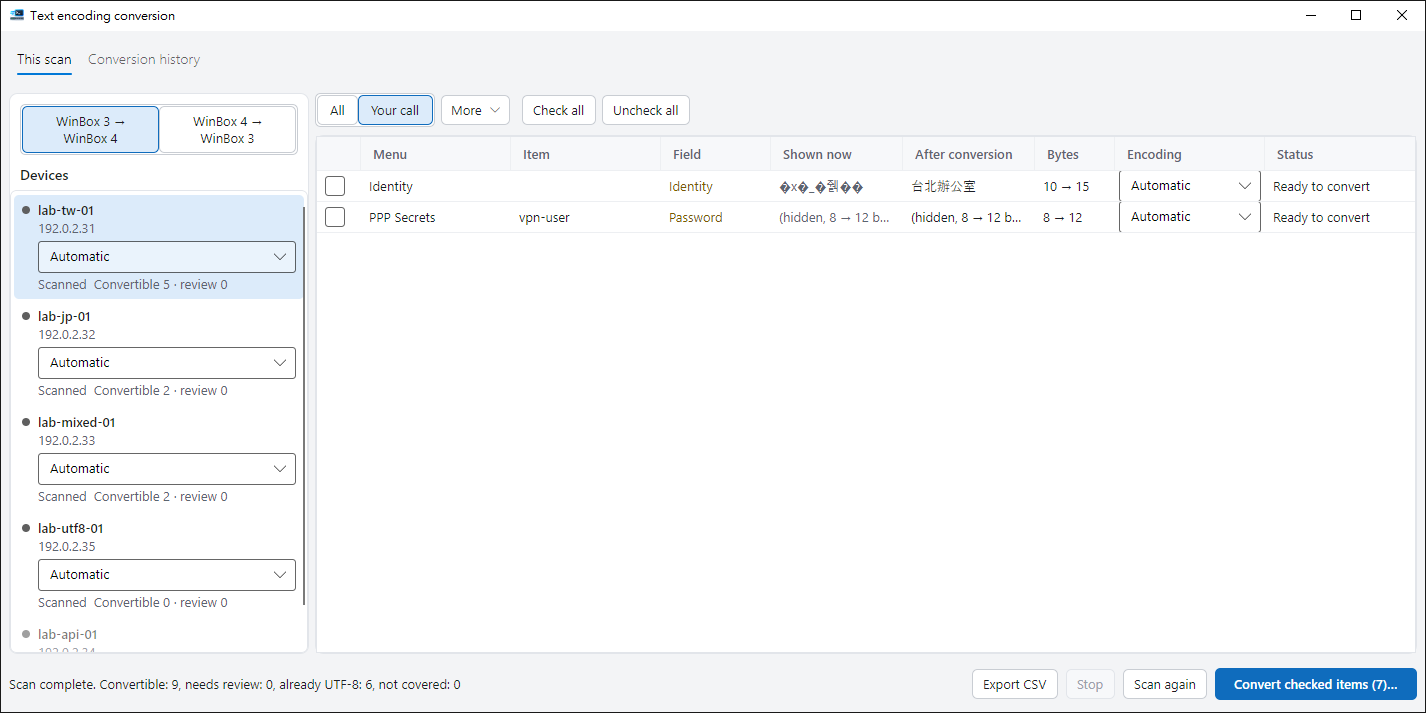
Ordinary items start checked. Device names, Wi-Fi names, user names and passwords can affect connectivity, so they start unchecked; click “Your call” to see only the items still waiting for you. A name used by a script is checked and unchecked together with that script.
4. Confirm and convert#
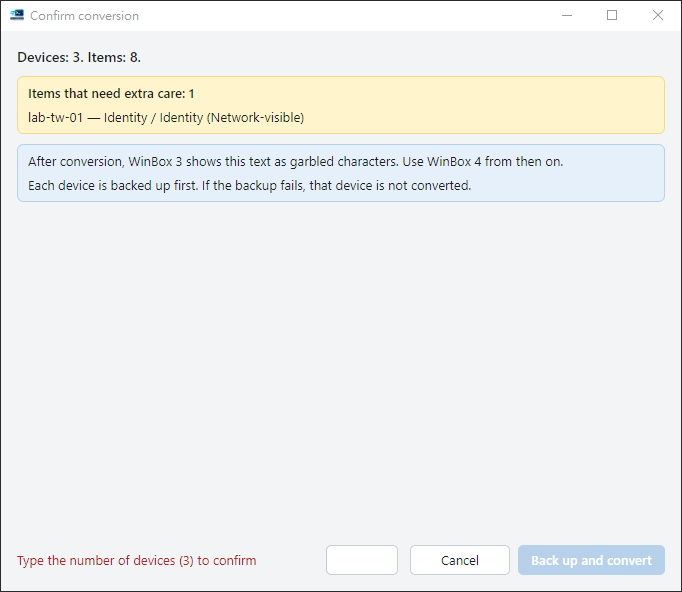
Clicking convert opens the final confirmation. If you checked items that need extra care, type the number of devices. After you confirm, each device is backed up first; a device whose backup fails is not converted.
5. Restore#
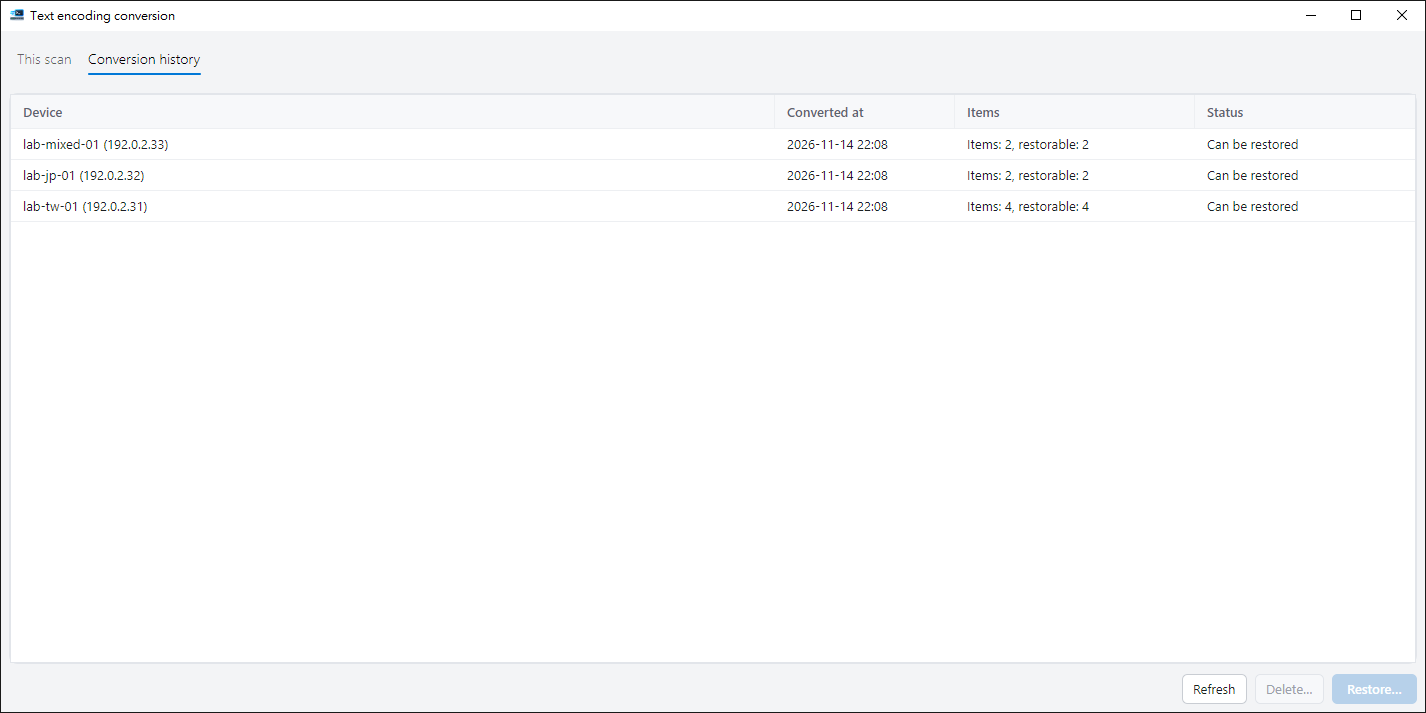
Open “Conversion history”, pick an entry and click “Restore” to put the original text back. Items changed again after the conversion are not restored.
6. Convert back for WinBox 3#
Choose “WinBox 4 → WinBox 3” at the top left and pick the target encoding under the device. Characters that encoding cannot represent are flagged and cannot be checked.
Tips#
- Right-click a device on the home page and choose “Check text encoding” to open it with only that device, without changing your selection.
- If the detected encoding is wrong, set one for the whole device or a single item. No rescan is needed.
- After conversion, the other WinBox version shows garbled text. Once text is converted for WinBox 4, stop editing those items in WinBox 3.